Online Batch Services
LexisNexis has enhanced its Online batch services to allow more user-friendly functionality for uploading batches and mapping layouts. Users sign into the main product to access the online batch services where they can attach files for submission, define batch fields, and provide confirmation of the order.
Topics in this section are listed below:
- Common Steps
- Deceased Person Batch
- Advanced Person Batch
- Real-Time Phones Batch
- Real-Time Motor Vehicle Registration Batch
- Reverse Phone Append
- View and Download the Output File
This section describes the steps that are applicable to all online batch services. They are: Select the Batch Service(s), Enter Job Details, Define Field Labels, and confirm the Permitted Use Certification, DPPA Compliance and DMF Compliance.
Steps that are applicable to only a specific batch service are described in that individual section.
Select the Batch Service(s)
Select one or more of the batch services you wish to run. Select Next
This is to allow users to select the batch file for processing.
1. Enter a name in the Job Name field. This is required information. It is later referenced on the Confirmation page.
2. Enter a Notification Email Address. An email will be sent to this address when the batch processing is complete. This is required information.
3. Re-enter the email address in the Confirm Email Address text box.
4. Select the Input File Type. Select Fixed Width if the file contains simple text; Select Comma Delimited if the file name has the .csv extension and is separated by a comma. Choose Tab Delimited, if the input fields are separated by tabs and select Pipe Delimited if the input fields are separated by pipes (|).
5. Select the Choose File button for the File to Process field. The File Upload/Open dialog box will display.
6. Locate the
batch file to submit and select the Open button. The file path displays in the Input
File field: The file cannot contain more than 200,000 records. If it does,
you will get a message before proceeding to the next step, informing you of the
file size error.
Note 2: The number of records in the file is used to calculate the cost
estimate of batch processing, which is shown in Batch Confirmation.
7. Click the Next button to proceed to the next step or click the Back button to return to the Select the Batch Service(s) page.
In this step users define the data type for each of the columns in the batch file, be it SSN, name, or phone number.
For Fixed Length Text File
In this type of files each record has exactly the same length.
If you select Fixed Width for file type, the Define Field Labels screen will show the beginning and ending positions (represented by numbers) of each field.
1. Use the down arrow to display a list in the Choose a Template field. This is applicable only if you have saved layouts (entered a template name in a previous job). If this is your first time processing a batch file, or if you never saved any layout from the previous jobs, the list will be empty.
o If you select a template from the saved list, you will be prompted for confirmation.
o Click the
OK button to confirm the selection.
Note: To delete a template that is not needed anymore select Delete Selected
Template
2. Enter in a Template Name if you want to save the Field labels for future use.
3. Select the YES radio button if the first row of the batch file is a title row that contains the text descriptions of the corresponding fields. Select NO if the first row contains data.
4. Use the down arrow in Column 1 to display a list of pre-defined data types and select one that is proper for the data in this column. For example, if the data in this column is the last names, you should select Last Name.
5. Use the down arrow by Start to select the beginning position of the field.
6. Use the
down arrow by End to select the ending position of the field.
Note: You need to count in all the reserved spaces for a field. For
example, if the reserved spaces for the Last Name is 15, even though in the
actual file the longest last names takes only 12 spaces, you still set the
Start as 1 and End as 15.
7. Click Add New Field. Column 2 appears below Column 1.
8. Use the down arrow by Column 2 to select a proper data type for the second field. If none of the labels in the list applies to the data in a column, select Not Applicable. This will allow the system to return this data field but ignore it for the purposes of locating your subjects.
9. Repeat Steps 4 and 5 to set the Start and End positions for the second field.
10. Repeat the steps above until you are done with all the fields in the file.
11. Select the Next button to proceed to the next step.
For Delimited File
If your file type is Delimited,
1. Check the box YES if the first row of the batch file is a title row that contains the text descriptions of the corresponding fields. Select No if the first row contains data.
2. Use the down arrow to display a list in the Select Template from List field. This is applicable only if you have saved layouts (entered a template name in a previous job). If this is your first time processing a batch file, or if you never saved any layout from the previous jobs, the list will be empty.
o If you select a template from the saved list, you will be prompted for confirmation.
o Select the
OK button to confirm the selection.
Note: To delete a template that is not needed anymore select Delete Selected
Template
3. Use the down arrow in Column 1 to display a list of pre-defined data types (which differ with different batch services) and select one that is proper for the data in this column. For example, if the data in this column is the last names, you should select Last Name.
4. Repeat the step above for the remaining columns. If none of the labels in the list applies to the data in a column, select Not Applicable. This will allow the system to return this data field but ignore it for the purposes of locating your subjects.
5. Enter a name in the Template Name field. (No special characters are allowed here. You will get an error message if you use them.) You can use the search criteria to name the template or use the batch name plus output options. For example, Advanced Person Batch By SSN. Once you enter something here, the data types defined in steps 3 and 4 will be saved for future usage.
6. Click the Next button to proceed to the next step.
You can save up to 10 templates. After 10 templates you will get an error message. To save a new template, you will have to delete a previously saved template.
1. From the Define Field Labels screen use the down arrow and select a template you do not wish to use anymore from the Choose a Template list. You get a prompt for selection confirmation.
2. Clicking OK to confirm the action.
3. Clicking the Delete Selected Template button on the right. You are prompted to confirm the deletion.
4. Click OK. The template is deleted from the saved templates list.
Permitted Use Certification, DPPA Compliance and DMF Compliance
Users must confirm the proper Permissible Use Certifications are correct by selecting Yes or No. If No is selected the users will be taken through the permissible use screens so they can select the appropriate GLB, DPPA and DMF Purpose before being able to confirm the batch.
The Deceased Person Batch allows a user to run a search on a subject by LexID, name, and/or social security number to determine if and when they passed away as well as verify subject name, social security number, date of birth, and last known address.
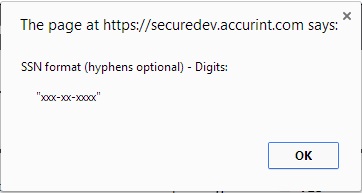
Note: The system validates the format of only the Social Security Number. If the data conflicts with the predefined data format, you will get a message, alerting you of the correct format for the data.
The Advanced Person Batch enables users to locate personal identifiable information on subjects including full name, social security number, date of birth, up to three addresses with phone numbers, and deceased information.
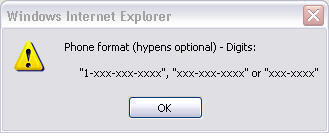
Note: The system validates the format of only two: the Social Security Number and the Phone Number. If the data conflicts with the predefined data format, you will get a message, alerting you of the correct format for the data.
The Real-Time Phones batch searches for data that will help agencies determine subjects' names and location based on search options including combinations of name, address, and SSN as well as phone number and LexID℠ queries. Data returned includes phone type, phone status, carrier details, and porting indicator to allow for contact to be made with operating companies for case investigations, including issuing subpoenas when necessary.
Below are step by step instructions on how to submit a Real-Time Phones batch file for processing.
You will not need to select a search option or any special processing options. Supported search criteria includes:
- 10-digit Phone Number Search Only
- Name and Address Search Only
- LexID Search Only
- Name and Social Security Number Search Only
Note: The system does not validate the format of any data such as the zip or phone numbers.
Real-Time Motor Vehicle Registration Batch
The Real-Time Motor Vehicle Registration Batch searches motor vehicle registration records including real-time data to return registration information such as name, address, expiration date, vehicle identification number (VIN), plate number and vehicle description.
Restrictions: The Real-Time Vehicle Registration Batch is subject to DPPA restrictions. A DPPA permitted use must be selected prior to querying the data and results will be restricted in accordance with the regulations of the state(s) involved.
Notes:
1. The system does not validate the format of any of the data types.
2. To exclude an input data type from the search set it to Not Applicable.
This process allows customers to run a query on a ten-digit phone number to find the current name and address associated with that phone number. Reverse Phone append also allows for de-duping to allow customers to only get back different information than what they may already have.
Append Fields
In this step you set the output options for the batch at additional cost.
1. To start, click the Reverse Phone Append link. The Append Fields screen displays.
2. There are two options on the screen: Select Special Processing Options on the top and OR Choose one of the following Special Batch Options at the bottom. There are three options on the top. The "Best Address -- By Date: Return Different Address and Phone" returns addresses and/or phone numbers. If an address and/or phone number is provided as input, the search will be conducted to only find addresses and/or phone numbers that are different and more current. The "Best Address -- By Date: Return Different Address" option returns addresses. If an address is provided as input, the search will be conducted to only find addresses that are different and more current. Phone numbers are not returned. The "Phones Only: Return Different Phone" option returns phone numbers. If a phone number is provided as input, the search will be conducted to only find phone numbers that are different and more current. Up to three phones can be submitted for comparison. Addresses are not returned. Alternatively, the option on the bottom can be selected to add up to five properties owned by the subject.
3. Click the Next button to proceed to the next step or click the Back button to return to the Batch Services main page.
Select the File to Upload
This will allow users to select the batch file for processing. For details please reference section Select the File to Upload of Common Steps.
Define Field Labels
In this step users define the data type contained in each of the columns within the batch file, be it SSN, name, or phone number.
For details please reference section Define Field Labels of Common Steps.
The following is a list of data types for Reverse Phone Append Batch:
- Not Applicable
- LexID
- Full Name
- First Name
- Middle Name
- Last Name
- Generational Suffix
- Address Line 1
- Address Line 2
- Address Line 3
- City
- State
- Zip
- Postal Code
- Social Security Number
- Phone Number 1
- Phone Number 2
- Phone Number 3
- Date of Birth
- Driver's License Number
- Driver's License State
Note: Off this list the system validates the format of only two: the Social Security Number and the Phone Number. If the data is in conflict with the predefined data format, you will get a message, alerting you of the correct format for the data.
Permitted Use Certification, DPPA Compliance and DMF Compliance
For details please reference section Permitted Use Certification, DPPA Compliance and DMF Compliance of Common Steps.
Batch Confirmation
This page allows users to review this batch setting and options, input file name and format, email address for notification, and the approximate charge for this job, prior to batch submission. If this information needs to be edited, you can click the Back button until you reach the desired page.
If all selections and information are listed as requested, click the Authorize Order button. A summary page with your batch job confirmation number plus other batch output details will appear.
To print the information on the screen, click the Print Order Confirmation button.
To run another batch job, click Run Another Batch button to return to the Batch Services main page.
 under Download Results.
The File Download dialog box pops up.
under Download Results.
The File Download dialog box pops up.